Showing posts with label 9 STEPS OF PEOPLESOFT APPLICATION DEVELOPMENT. Show all posts

Sunday, 9 August 2015

TRAINING (PS-12) - PeopleSoft Application Development - Part9 (Step-4: Build the SQL Table - Creating Online Views)

Step-4: Build the SQL Table - Creating Online Views

When you create views to use online, you must keep the views synchronized with the database.  Like SQL tables, you must have a record definition for online views because the system looks to the record definitions for online processing rules.  And you must build the view before you can use or reference it online.

If you use a view as the basis for a panel, you select existing information to display on the panel.  So, when you create the record definition for your view, you can clone an existing record definition, delete any fields not used in the view, and proceed to define the view.  Query views are processed the same way as view text, which is defined as part of the record.

To create online views

1.) Clone a record definition.
Open an existing record definition, and then select File, Save As.  Specify the name of the view you want to create.

2.) Delete and add the appropriate fields, so that all columns selected in your view have a corresponding field in the record definition.

3.) Select File, Object Properties,  and select the Type tab on the Record Properties dialog

4.) Select SQL View in the Record Type group box.

5.) Enter your view text in the SQL View Select Statement: edit box.
Make sure the order you list the columns in your SQL SELECT statement matches the order specified in the record definition.

6.) Save the record definition.

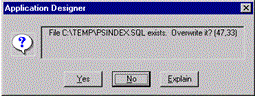
7.) Select Build, Current Object to create the view in the database.

8.) Select Create Views checkbox under Build Options, and press Build.

Saturday, 8 August 2015

TRAINING (PS-11) - PeopleSoft Application Development - Part8 (Step-4: Build the SQL Table)

Step-4: Build the SQL Table

Using Application Designer, you create several kinds of object definitions that represent database components.  For instance, field definitions represent table columns, and record definitions represent tables, indexes, and views.  The important concept to remember is that the definitions are just the blueprints for the actual, physical database components with which they are associated.  In the context of the whole application development cycle, using the Build process (creating SQL tables, views, and indexes) comes after you've defined new fields and created the record definitions.  After you build the SQL tables you would then begin creating Panel definitions.

After you create and define your field and record definitions, you will need to create the underlying SQL tables that will actually house the application data that your users will enter online in your production environment.

Build uses Data Definition Language (DDL) to construct a physical database component based on the associated record and field definitions you've created.

  •  Tables
  •  Views
  •  Indexes
  •  Triggers

Build Menu
You use the Build menu in Application Designer to access the Build dialog by selecting either Current Object or Project.  You can also select the Settings menu option to review the Build Settings dialog to make sure that you have selected all of the appropriate options for your build process.


You use the Build dialog to create and/or run the SQL scripts that define the underlying database components.  Use it to build tables, indexes, views, and to alter existing tables.

Build Scope
There are three different scopes of the Build feature that determine the size of your build project. Depending on what you actually want to build—one record or an entire project—you can determine this by selecting one of the scopes described in the following sections.
  • Current Object
    Select Build, Current Object when you want to build or alter the active record definition.
  • Build Project
    Select Build, Project when you want to build or alter all the records, indexes, and views in the current project—all the records that appear in the project workspace.  As shown in the following example, you will typically find numerous record definitions in the Build Scope list box.
  • Build Selected Objects
    If you do not want to build an entire project or even the current project, you can opt to build just the objects you select in the project workspace.  In some situations you may just want to build a subset of the records in the project that is currently open.  You can select the objects you want to build by pressing the Ctrl button, and selecting multiple records in the project workspace.  After you have selected the appropriate records, then, with a right-mouse click, invoke the popup menu, which offers the Build option. 

To Build all objects in a database, you would create a new project and insert all the appropriate records; you can just insert records of a particular type, such as views.  If  you create another record after the "all records" project is built, you need to manually add the new record to the project.

Build Dialog
You use the Build dialog to create and/or run the SQL scripts that define the underlying database components.  Use it to build tables, indexes, views, and to alter existing tables.


Build Options
The Build Options group allows you to specify what action you want to occur:
  • Create Tables
  • Create Indexes
  • Create Views
  • Alter Tables
  • Create Triggers
If you select Create Tables or Alter Tables, then, by default, Create Indexes will automatically be selected.

Build Execute Options
The Build Execute Options group offers the following options:
  • Build script file: The advantage to using this option is that you can review and update the SQL prior to executing the script.  
  • Execute SQL now: The advantage in using this option is it's not necessary to invoke another program to run the SQL; the SQL runs as part of the Build process.  The disadvantage with running the SQL immediately is that you have no opportunity to review the SQL prior to it being committed to the database. 
  • Execute and build script: The advantage of this option is that you can review the SQL that the Build process just ran.

Build Settings
Pressing the Settings button from the Build dialog opens the Build Settings tab dialog where you can view or change your options.


The Build Settings dialog offers the following tabs:
  • CREATE: Specify your Create Table and Create Views options.
    When you select Create Tables or Create Views, you'll want to make sure that you also specify the desired options on the Create tab on the Build Settings dialog. The following sections describe what the options on the Create tab mean to your build. The following sections describe the options that the Alter tab offers.


    Table Creation Options
    These options determine when a table should and should not be created.

    (i) Recreate table if it already exists:
    This options will always drop and recreate a table if it already exists.  Use this option with extreme care because if there is any data in the table that already exists, it will also be dropped. If you select this option, Build prompts you to confirm your specified intention prior to performing any destructive action.  If you don't care about losing the data that resides in the table, then this option is much faster compared to doing an alter.

    (ii) Skip table if it already exists:This option will only create those tables that are newly defined. If you want to preserve the data already residing in existing tables or you're just interested in creating the tables that do not already exist, this is the appropriate option.

    View Creation Options
    Similar settings are available for creating views that you use for creating tables.

    (i) Recreate view if it already exists:Since views are just logical views of data, it is safe to use this option;  you don't run the risk of losing physical data.  Using this option ensures that all views in the project are rebuilt, whether they need to be or not.

    (ii) Skip view if it already exists:If you're only concerned with creating views that do not already exist in the database, this is the appropriate option.  This option is useful if you want to run Build Project on a large project and only a subset of the views in the project need to be created.  This consumes less time than recreating all the views in the project.
  • ALTER: Specify your options when running Alter Tables.
    If you make any changes to your record definitions, you'll need to make sure the tables in your production database reflect the current definitions to maintain your data integrity.  When you perform an alter, make sure you select the appropriate options on the Alter tab. The following sections describe the options that the Alter tab offers.


    Drop Column Options
    The Drop Column Options are referenced whenever a field is deleted from a PeopleTools record definition and data exists in the database for that column.

    (i) Drop column if data present:
    If you have this selected then the column and data will be dropped and a warning will be written to the build log.

    (ii) Skip record if data present:If you have this selected, then the alter for that record is aborted and an error message will be written to the log.  Processing continues with the next record.

    Change Column Length Options
    The Change Column length options are used whenever the length of a character column is reduced in PeopleTools and an alter could result in data truncation.

    (i) Truncate data if field too short:If you have this selected and the alter could result in data truncation then the record is altered and a warning message is written to the build log.

    (ii) Skip record if field too short:If you have this selected in this case then the alter for that record is aborted and an error message is written to the build log.  Processing continues with the next record.

    Alter Any
    PeopleTools assumes you want to perform alters for any modifications made to tables, so, by default, all the check boxes in the Alter Any group are selected.  Alter Any allows for custom alter processing regarding:

    > Adds
    > Changes
    > Renames
    > Deletes.  


    For example, you have the flexibility to add, change, and rename fields, but not delete any removed columns.  When you complete any other custom external conversion processes, you can then enable the delete processing to drop columns that are no longer defined.

    The Change Column length options are used whenever the length of a character column is reduced in PeopleTools and an alter could result in data truncation.

    Normally you would have all of these options selected, but during upgrades or operations requiring data conversion steps you may choose a subset of actions.

    For Example
    - Perform alter with Adds and Changes selected.
    - Perform data conversion routines to populate the new and changed columns (perhaps from columns that are ultimately to be dropped).
    - Perform alter with Rename and Delete selected.

    Alter even if no changes
    Select this check box to force an alter, even if no changes were made to the tables. This check box is deselected by default. If selected, the Alter by Table Rename option in the Alter Table Options group box is automatically selected and the Alter in Place option is disabled.

    Alter Table Option
    When altering tables, the alter process takes care of the indexes, regardless of the Alter Table Options you select on the Alter tab of the Build Settings dialog box.

    (i) Alter in Place:
    >
    Only get enabled when Alter even if no changes check box is deselected.
    > For the Alter in Place option, the index creation process goes through the Recreated index only if modified option on the Create tab.

    (ii) Alter by Table Rename:
    >
    Select to create a temporary table (with changes made to the original table or its fields); the data from the original table is imported into the temporary table. The original table is then dropped and the temporary table is renamed to the original table.
    In the case of Alter by Table Rename, the indexes are dropped automatically when the temporary table is dropped.
    If a table is renamed from the old name to a new name, the indexes that were created for the old table are moved to the new table, but the index names remain in the name of the old table. With Alter by Table Rename selected, the indexes of the old table are dropped before being renamed to the new table name, and the indexes are recreated after the table is renamed to the new name. This way, the index is created in the name of the new table.

  • LOGGING: Specify the desired logging level and where you would like the output log file the build process generates.

    One way that you can monitor the build process is to review the log files that the build process automatically generates.  Keep in mind that the log file is entirely separate from the script file; do not confuse the two.  How much information that the log file contains is up to you.  You can set up your logging so that all status (both good and bad) appears in the log, or you can specify that just the errors or warnings appear in the log.  This section describes the options you can specify in regards to the Build log file.

    You control the settings for the Build log file on the Logging tab on the Build Settings dialog.  Here your specify the desired Logging Level and how you would like to view the log information—from a file or in the output window.


    Logging LevelSelect one of the options in the Logging Level group to specify the detail of information that you want in your Build log output.

    (i) Fatal errors only: If you're only interested in seeing the operations that failed.
    (ii) Fatal errors and warnings: To add warnings to that mix by selecting.
    (iii) Fatal errors, warnings and informational: To see everything that processed successfully and all of the errors and warnings.

    Logging Output
    The Logging Output group allows you to specify where and in what form you would like to view your log output.  You have the following options:


    (i) Log to output window: Writes the same information that would appear in the log file to the Application Designer output window.  Always be aware of the level that you've selected. If there is a lot of detail (high logging level plus many record to process) it may be easier on the eyes to print the logging information to a file, and print it later.

    (ii) Log to file: Writes the log to a file.  If you select this option, you have the option to specify a custom location and name for your log file in the Log file name edit box.  If you do not select this option, the edit box will be disabled.

    (iii) Log settings: The option writes all of the runtime options to the log.  If you select this option it will not be necessary to rerun a test when you have a problem. Should it be necessary to report a problem with the Build process or troubleshoot, it is important to know the settings that were active.
  • SCRIPTS: You can choose the format of your script file and the name and location of the file that the build process generates.

    If you've elected to build a script file then the build process will generate a script file that contains all of the CREATE and/or ALTER SQL statements so that you can review them prior to running the SQL through another SQL command processor.  If the generated script file meets your requirements a DBA can run the script at a later date.  Build can produce multiple scripts during a single run—one for each build option—depending on the script settings that you specify at run time.  For example, you can specify that the Build process generate a separate script for your tables, views, indexes, and alters, or you can opt to have all the SQL for each action contained in one script.

    You use the Scripts tab on the Build Settings dialog to specify where the SQL script is written, whether or not you want multiple scripts generated for each object type, and whether you want previous scripts overwritten.

    The following sections describe the options you can specify regarding the build scripts you will generate.


    CommentsThe Write Alter comments to script check box is simply a switch allowing you to either include or suppress alter comments.

    Script File Options(i) Output to single file:If you prefer to have all of your statements—CREATE, ALTER, and so on—contained in a single file, then select the Output to single file option.

    (ii) Output to separate files:
    If you would like all of your CREATE TABLE statements to be written to one SQL script file and your CREATE INDEX statements to another, then select the Output to separate files option.

    File Overwrite Options
    The File Overwrite Options will indicate whether you want to automatically overwrite or be prompted before script files get overwritten.  Your personal preference determines which technique you employ.

    (i) Always Overwrite:
    If you don't mind that your previous build scripts get overwritten, then select Always overwrite.


    (ii) Prompt for each overwrite:
    If you are more comfortable being alerted when a script is about to be overwritten, then select Prompt for each overwrite.

    The following example shows the type of prompt that appears to alert you of an impending script file overwrite.


    Script File Names
      The options available to select in the Script File Names group box depends on your selection in the Script File Options group.

      Output to Single File
        When you have Output to single file selected in the Script File Options group, just one edit box will appear in the Script File Names group box:  All Output File Name. The default name for the generated script will be PSBUILD.SQL

        Output to Separate Files
          If you have Output to separate files selected in the Script File Options group, the following four edit boxes appear—one for each build option—in the Script File Names group box.
            Create Table File Name.  The default name for this script is PSTABLE.SQL.
            Create Index File Name. The default name for this script is PSINDEX.SQL.
            Create View File Name. The default name for this script is PSVIEW.SQL.
            Alter Table File Name. The default name for this script is PSALTER.SQL.

          The options most likely to change each time you run a build process appear on the Build dialog, and the options that are most likely to remain the same from run-to-run are defined in the Build Settings dialog.  Since most of the settings you choose, due to your preferences, will remain similar from one build to the next, all of the options defined on the Build Settings dialog are retained between sessions, including the Build Execute Options selections from the Build dialog.  The attributes that PeopleTools does not retain are the Build Options selections from the Build dialog.


          After execution of Build Script:
          The Create Table process creates a new application table based on parameters defined in the record definition.  When a new table is created, the DBMS updates the System Catalog tables to reflect the attributes of the new table.

          After you build an updated SQL build script and execute it, the PeopleTools tables and the System Catalog tables are synchronized; the record definition and the Application Data table are synchronized.

          Tables:
          The Build process generates the appropriate SQL Create statements to build tables based on both your record definition and your platform.  It prefaces each new application SQL table with a PS_ to identify it as an application built using PeopleTools.
          For example: PS_ABSENCE_HIST

          Inxex:
          Build also creates the appropriate indexes.  And, because Long Character fields operate more efficiently in some database environments when they're located at the end of the table, Build automatically positions Long Character fields at the end of the table for each database environment.

          View:
          When you create views to use online, you must keep the views synchronized with the database.  Like SQL tables, you must have a record definition for online views because the system looks to the record definitions for online processing rules.  And you must build the view before you can use or reference it online.

          If you use a view as the basis for a panel, you select existing information to display on the panel.  So, when you create the record definition for your view, you can clone an existing record definition, delete any fields not used in the view, and proceed to define the view.  Query views are processed the same way as view text, which is defined as part of the record.

          Friday, 7 August 2015

          TRAINING (PS-10) - PeopleSoft Application Development - Part7 (Step-3: Create Record Definition)

          Step-2: Create Record Definition

          To create Record Definition
          1.) Select File, New or click the New button on the Application Designer toolbar.


          2.) Select Record and click OK.
          A record definition window is displayed in the object workspace.
          Your workspace is designed to build a list of fields in a record definition.


          To open an existing record definition
          1.) Select File, Open or click the Open toolbar button to open an existing record definition.

          2.) Select Record from the Object Type list and then click Select.
          The Open Object dialog is displayed.


          3.) In the Open Object dialog enter the first letter of the record you are searching for and click Select.
          PeopleTools will search for all existing records starting with that letter.
          For example, if you press P, you will see a display all of the record definitions that begin with that letter.

          4.) You can further narrow the search criteria by specifying Type and/or Project.


          5.) You can also open an existing record from the project tree view by double clicking each node.


          Thursday, 6 August 2015

          TRAINING (PS-9) - PeopleSoft Application Development - Part6 (Step-2: Create Field Definition - Effective Dates)

          Step-1: Create Field Definition - Effective Dates
          • The EFFDT (Effective Date) field has special properties related to the processing of effective dates on rows and should only be used when needed.
          • EFFDT only on record definitions where you want to maintain data history—future, current, and past - to store rows of data in sequence.
          • For effective-dated rows, you can only have one current row of data, but multiple occurrences of future and history.

          Understanding Effective Dates
          Effective dates allow you to keep historical, current, and future information in tables.  You can use the information to look at what's happened up to now and plan for the future.

          Future - Data rows that have effective dates greater than the system date—usually today's date.
          Current -  The data row with the most recent effective date closest to today's (system) date, but not a future date.  Only one row is the current row.
          History - Data rows that have effective dates less than the current data row.

          To enable you to track an accurate history of all your effective-dated information, the system invokes special logic when you access a panel associated with a record definition that contains EFFDT.  The menu action type that you select will dictate whether you can access the row type and what you can do with each type of row.

          Action Type
              View
          Change
          Insert New Rows
          Update/Display
          Current, Future
          Future only
          Effective Date Greater Than the Current Row
          Update/Display All
          History, Current, Future
          Future only
          Effective Date Greater Than the Current Row
          Correction
          History,Current, Future
          All Existing Rows
          Add New Rows with No Effective Date Restrictions

          Update/Display Mode, you can view only current and future rows.  You can't access history.
          Update/Display All Mode, you can view all History, Current and Future rows.

          Correction Mode, you can do it all.  View, change, and insert rows of data regardless of the effective date.

          Wednesday, 5 August 2015

          TRAINING (PS-8) - PeopleSoft Application Development - Part5 (Step-2: Create Field Definition - What is Translate Table)

          Step-1: Create Field Definition - What is Translate Table

          The Translate Table is a prompt table that serves as an all purpose data dictionary to store values for fields.

          Field Type Character.
          Field Length 1 to 4 characters.
          Field Values Consist of a relatively small, static set of values not maintained by the user.
          Other Fields No other fields are related to this field.

          When to Use the Translate Table
          To better understand how the Translate Table works, consider the relative attributes of a Department ID field and a Sex field in a company database.  Your company may have hundreds of Department IDs and the field may need to be longer than three characters.  Other fields, such as department manager, may be associated with the department.

          The Sex field, on the other hand, has two values—M (Male) and F (Female).  Because it has a relatively low number of values and the field is less than four characters in length, the values for this field should be included on the Translate Table.

          To add Translate Values
          1.) From a Field Definition window, click the Properties button or go to File, Object Properties.
          2.) When the Field Properties dialog is displayed, select the Translate Values tab.


          The Translate Values dialog box displays any existing values for the field and enables you to Add, Change, or Delete values.
          In the Last Updated box, you'll see information—date, time, and operator ID—about the last update for the selected translate value.
          3.) Click Add to define a new value.


          4.) In the Add Translate Table Value dialog box, enter the Field Value that your users will enter on the panel.

          The Field Value is the translate value for the field.

          The system automatically sorts values in ascending order as you enter them.  So if you enter three translate values with Field Values A, T, and C, they will appear in the Translate Values dialog box as A, C, T.

          The Effective Date defaults to today's date.  You should change it to the date when you want this value to take effect.  If you want the effective date to predate all rows on your database, enter 01012002 (January 1, 2002).

          5.) To describe the value, enter a Long Name of up to 30 characters and Short Name of up to 10 characters as you would like it to appear on panels and reports.

          If you leave Short Name blank, the system automatically copies the first 10 characters of Long Name into this field.

          Tuesday, 4 August 2015

          TRAINING (PS-7) - PeopleSoft Application Development - Part4 (Step-2: Create Field Definition)

          Step-1: Creating the Field Definitions

          Fields are where you actually enter and store individual pieces of data such as names, dates, salaries, and so forth.  When you define a field, you give it a set of basic characteristics depending on how the field is used, what kind of data it contains, and how it is edited.  Should it be a character field or a number field?  Should automatic formatting be used?  How large should it be?

          To create a new field definition:
          1.) Click the New button on the Application Designer toolbar or select File, New.
          The New dialog box is displayed.


          2.) Select Field and click OK.
          The New Field dialog box is displayed.

          3.) Select a field type.
          Once you make a choice, the object workspace displays a field definition window for you to complete your new field definition.


          4.) Once you are done, click the Save button or select File, Save.

          Field Types
          We can create several different types of fields using Application Designer.

          Character - An alphanumeric field of fixed length.
          System Shorthand: CHAR

          Long Character - An alphanumeric field of variable length; used for textual entries such as comments or descriptions.
          System Shorthand: LONG

          Number - A positive numeric field of fixed length for which decimals are allowed.
          System Shorthand: NBR

          Signed Number - A positive or negative numeric field of fixed length for which decimals are allowed.
          System Shorthand: SIGN

          Date - A date field, the length of which is system-maintained.  Built-in edits prevent the entry of illegal dates such as day 42 or month 20.  Date fields always store a four-digit year, including century, to ensure proper functionality after the year 2000.
          System Shorthand:  DATE

          Time - A Time field, the length of which is system-maintained.  Built-in edits prevent the entry of illegal times such as hour 26, minute 70, or second 94.
          System Shorthand: TIME

          DateTime - A date and time field, the length of which is system-maintained.  Built-in edits prevent the entry of illegal date/times as defined in the individual Date and Time fields.  DateTime fields always store a four-digit year, including century, to ensure proper functionality after the year 2000.
          System Shorthand: DTTM

          SubRecord - A SubRecord field that represents a group of fields as defined on a SubRecord definition.
          System Shorthand:  SREC

          Image - An image field you can use to store images in a user defined format, such as bitmap (BMP) or Postscript (EPS).
          System Shorthand: IMG

          Field Properties
          To see a field's properties from a Field Definition window, click the Properties button or go to File, Object Properties.
          OR
          If you are in a Record Definition window, first open the Field Definition window by highlighting the field, right-clicking the field name, and selecting View Definition from the Pop-up menu.  From here, you can view the field's properties.


          NOTE: In the above screenshot you could see Translate Values. Its a special feature for fields in PeopleSoft application development. We will discuss about Translate Values in details in my next post.

          Monday, 3 August 2015

          TRAINING (PS-6) - PeopleSoft Application Development - Part3 (Step-1: Design The Application)

          Step-1: Design The Application

          Design the application is the first step of any application development in PeopleSoft. It needs proepr planning to analyze the business requirement and prepare a plan as how & what needs to be created to achieve it. Therefore before start any PeopleSoft application development we must have a requirement or design document which will contain the tables affected and the relationships between them, list of object definitions to be created or modified, GUI & Look/feel preparation document.

          Sunday, 2 August 2015

          TRAINING (PS-4) - PeopleSoft Application Development - Part1 (Nine Steps for PS Application Development)

          PEOPLESOFT APPLICATION DEVELOPMENT

          Every PeopleSoft application is a collection of related objects that have been designed to work together for a specific purpose.  These objects include fields, records, panels, and other objects that all interact with one another.  Developing and customizing PeopleSoft applications is a step-by-step process in which such objects are defined and built, relationships among objects are established, security is implemented, and every aspect is tested thoroughly.  The majority of these activities are completed using one interactive tool—Application Designer.

          The "Nine Steps" of Application Development
          The Nine Steps of Application Development utilize multiple PeopleTools and impact databases System Catalog tables, PeopleTools tables, and Application Data tables.

          1. Design the Application
          2. Define New Fields
          3. Create the Record Definition
          4. Build the SQL Table
          5. Create the Panel Definition
          6. Define the Panel Group
          7. Create the Menu Definition
          8. Enable Security
          9. Test the Application