Sunday, 9 October 2016

TROUBLESHOOTING (PS) - TMADMIN_CAT:196: ERROR: The boot mode is only available on the MASTER processor

ISSUE:
While booting the app server on Virtual box for PUM getting below error:

TMADMIN_CAT:196: ERROR: The boot mode is only available on the MASTER processor

SOLUTION:
Recently after upgrading my virtual box on windows 10, I am unable to boot the app server on PUM, possibly due to some configuration file PSTUXCFG corrupted.

To resolve the issue:
1. Take the backup of existing PSTUXCFG file.
2. Delete/Rename the PSTUXCFG file.
3. Reconfigured the domain with the same settings.
4. Boot the domain again.

Issue resolved.

Saturday, 13 August 2016

PROJECT MANAGEMENT (PMP-1) - KNOWLEDGE AREAS & PROCESS GROUPS

PROJECT MANAGEMENT - KNOWLEDGE AREAS & PROCESS GROUPS


KNOWLEDGE AREAS
As per PMI (Project Management Institute) below are the 9 Knowledge Areas for a Project Manager to manage the projects.

1. Integration Management
2. Scope Management
3. Time Management
4. Cost Management
5. Quality Management
6. Human Resource Management
7. Communication Management
8. Risk Management
9. Procurement Management


PROCESS GROUPS
Every Knowledge Areas has below mentioned 5 Process Groups.

1. Initiate
2. Plan
3. Execute
4. Monitor & Control
5. Close

Monday, 8 August 2016

TROUBLESHOOTING - X-server Xming unable to take input for Oracle FMW, Weblogic, DBCA wizard redirected using DISPLAY redirection


ISSUE:
X-server Xming unable to take input for Oracle FMW, Weblogic, DBCA wizard redirected using DISPLAY redirection

Recently while doing an OBIEE softtware install on linux server using EXPORT DISPLAY variable and rdirecting outout to a wintel machine using X-server like Xming, I was unable to provide keyboard input for Oracle FMW, Weblogic, DBCA wizard, as given  in below screenshots.


SOLUTION:
There was no solution found on MOS but after investigation it has been found that this kind of issue might appear due to incorrect JAVA version compatibility between XMing, Oracle software wizzards in commEnv.sh.

In order to fix the issue, I had to use a lower JDK version from a temp location.

1.) Download JDK version 1.6.0_45 could be downloaded from below URL:

http://www.oracle.com/technetwork/java/javase/downloads/java-archive-downloads-javase6-419409.html

2.) Once downloaded, extract install JDK in a temp location say /opt/oracle/test_java/jdk1.6.0_45

3.) Take the backup of commEnv.sh present inside <FMW_HOME>/wlserver_10.3/commn/bin

4.) Open the commEnv.sh and find JAVA_HOME
Comment out the exising higher version JAVA_HOME path and add New JAVA_HOME value for lower version JDK.

JAVA_HOME="usr/java/jdk1.7.0_05"
JAVA_HOME="/opt/oracle/test_java/jdk1.6.0_45"


5.) Save the file.

6.) Close the Oracle FMW, Weblogic, DBCA wizard on wintel.

7.) Execute the command fro Lnux machine using XMing & DISPLAY variable and this time you should be able to use keyboard and mouse successfully in the wizzard.

8.) Once wizzard run successfully. Rvert back the JDK version in commEnv.sh to original values for JDK higher version.

Thursday, 4 August 2016

TRAINING (ORA-10) - Shutting Down Database & Instance Recovery


Different Shutdown Modes of an Oracle Database

There can be four different shutdown mode.
1.) ABORT
2.) IMMEDIATE
3.) TRANSACTIONAL
4.) NORMAL


What can be done in different shutdown modes


A = ABORT        I = IMMEDIATE        T = TRANSACTIONAL        N = NORMAL

What happens During shutdown

A.) For a Consistent (Clean) Database


B.) For an Inconsistent (Dirty) Database


Instance or crash recovery
> Is caused by attempts to open a database whose files were not synchronized on shutdown
> Is automatic
> Uses information stored in redo log groups to synchronize files
> Involves two distinct operations
         Rolling Forward: Data files are restored to their state before the instance failed.
         Rolling Back: Changes made but not committed are returned to their original state.


Phase of Instance Recovery
- Data files out-of-sync
- Roll forward (redo)
- Committed and non-committed data in files
- Roll back (undo)
- Committed data in files

Wednesday, 3 August 2016

TRAINING (ORA-9) - Different Stages while Opening an Oracle Database


Different Stages while Opening an Oracle Database

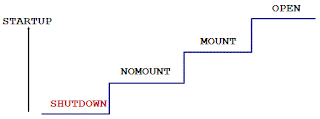
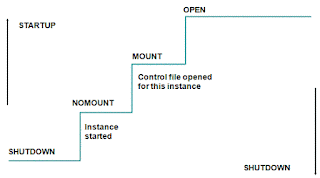
When Oracle software binaries tries to open an Oracle database, it passes through three different stages:

1.) Startup (nomount)
2.) Mount
3.) Open


High level requirements for opening an Oracle database:
> All control files must be present and synchronized
> All online data files must be present and synchronized
> At least one member of each redo log group must be present


Stage-1: Starting Up a Database (NOMOUNT)

Command:

SQL> startup nomount


Stage-2Starting Up a Database (MOUNT)

Command:
SQL> startup mount
or
SQL> alter database mount


Stage-3: Starting Up a Database (OPEN)

Command:
SQL> startup
or
SQL> alter database open


High level requirements for keep an Oracle database running
Once open, the instance could fail with:
Loss of any control file
Loss of a data file belonging to the system or undo tablespaces
Loss of an entire redo log group. As long as at least one member of the group is available, the instance remains open.

Thursday, 28 July 2016

TRAINING (ORA-8) - Different Oracle Authentication Type


Different Oracle Authentication Type
Oracle Authentication can be of following type:

1.) Password:
This is also referred as authentication by database.

2.) External:
This is also referred as authentication by OS. With external authentication, your database relies on underlying OS or network services to restrict access to database accounts. User can connect oracle database without specifying user name and password.

3.) Global:
Allows users to be identified through the use of biometrics, x509 certificates, token devices and Oracle Internet Directory.


The password file: The problem, password file addresses is how to authenticate a user when the database is not open, or indeed before the database has even been created or an instance started. Users are nothing more than rows in a table in the data dictionary. You can see them and their encrypted passwords by querying the data dictionary view DBA_USERS. When you create a user, you are simply inserting rows into the data dictionary.

It is therefore vitally important that Oracle should authenticate you, before letting you connect as such a user. But if the database is not already created and open, how can Oracle query the data dictionary to validate your username and password, and thus work out who you are and what you are allowed to do? To resolve this paradox, Oracle has provided two means of authentication that are not data dictionary based and therefore do not require the database to be open, or even to exist. These are:

1.) Operating System authentication
2.) Password file authentication.

For operating system authentication, Oracle delegates responsibility for identifying a user to the host operating system. At installation time (not database creation time!) you specified an operating system group name that would own the Oracle software, defaulting to dba on Unix, ORA_DBA on Windows. If you are logged on to the computer hosting the Oracle installation as a member of that group, then you will be allowed to connect (using appropriate syntax) to an instance, start it up, and open or create a database without any username/password prompt. Clearly, this relies totally on your operating system being secure, which it should be: that is out of Oracle’s control and relies on decent system administration.
But this mechanism can’t work if you are connecting to the instance remotely, across a network: you will never actually log on to the operating system of the machine hosting the Oracle server, only to the machine where you are working. This is where the password file comes in: it is an operating system file, with usernames and passwords encrypted within it, that exists independently of the database. Using appropriate syntax, you can connect to an instance, respond to a prompt with a username/password combination that exists in the password file, start the instance, and open an existing database or create a new one. If you do not need to start the instance and open the database across a network but you can always log on to the computer hosting the Oracle installation, then a password file is not strictly necessary because you can use operating system authentication instead. However, for practical purposes, you will always have one.


Ordinary users cannot start up or shut down a database. This is because an ordinary user is authenticated against the data dictionary, and it is logically impossible for an ordinary user to start up (or create) a database, since the data dictionary cannot be read until the database is open.

We must therefore connect with some form of external authentication: you must be authenticated either by the operating system, as being a member of the group that owns the Oracle software, or by giving a username/password combination that exists in the external password file. You tell Oracle that you wish to use external authentication by using appropriate syntax in the CONNECT command that you give in your user process. If you are using Database Control, it is easy: in the Connect As combo box you select either SYSOPER or SYSDBA.

These are the possibilities:
connect user/pass[@db]                 :      data dictionary authentication.
connect user/pass[@db] as sysdba    :      external password file
connect user/pass[@db] as sysoper   :      external password file
connect / as sysdba                       :      OS authentication
connect / as sysoper                      :      OS authentication

TRAINING (ORA-7) - Undo Management and Undo Tablespace


Undo Management and Undo Tablespace

Undo data is:
- A copy of original, pre modified data
- Captured for every transaction that changes data
- Retained at least until the transaction is ended
- Used to support:
Rollback operations
Read-consistent and flashback queries
Recovery from failed transactions


Monitoring Undo: Undo usually requires little management. Areas to monitor include:
- Undo tablespace free space
- “Snapshot too old” error


Administration of undo:

- Issue
     > Undo tablespace space errors
- Solution
     > Size the undo tablespace properly
     > Ensure large transactions commit periodically

- Issue
     > “Snapshot too old” errors
- Solution
     > Configure an appropriate undo retention interval
     > Size the undo tablespace properly
     > Consider guaranteeing undo retention

TRAINING (ORA-6) - Delivered Tablespaces in the preconfigured Database


Delivered Tablespaces in the preconfigured Database

SYSTEM
- The SYSTEM tablespace is always created at database creation. Oracle uses it to manage the database.
- It contains the data dictionary, which is the central set of tables and views used as a read-only reference describing a particular database.
- It also contains various tables and views that contain administrative information about the database. These are all contained in the SYS schema, and can only be accessed by user SYS, or other administrative users with the required privilege.
- For system users, the default permanent tablespace remains SYSTEM.

SYSAUX
- This is an auxiliary (supplementary or supportive) tablespace to the SYSTEM tablespace. This reduces the load on the SYSTEM tablespace.
- Introduced in Oracle 10g. Components that use this as their default tablespace during installation
- Every Oracle Database 10g or higher level database must have a SYSAUX tablespace.
- SYSAUX tablesaces include Automatic Workload Repository, Oracle Streams, Oracle Text, and Enterprise Manager Repository components and products.
- Some of the components and products mentioned above earlier used to be in SYSTEM tablespace but now use the SYSAUX tablespace.

TEMP
- This tablespace stores temporary data generated when processing SQL statements. It would, for example, be used for sort work space.
- Every database should have a temporary tablespace that is assigned to users as their temporary tablespace.
- In the preconfigured database, the TEMP tablespace is specified as the default temporary tablespace. This means that if no temporary tablespace is specified when the user account is created, then Oracle assigns this tablespace to the user.

UNDOTBS1
- This is the undo tablespace used by the database server to store undo information.
- Every database must have an undo tablespace that can be created at database creation.

USERS
- This tablespace is used to store permanent user objects and data.
- Like the TEMP tablespace, every database should have a tablespace for permanent user data that is assigned to users. Otherwise, their objects will be created in the SYSTEM tablespace, and this is not good practice.
- In the preconfigured database, USERS is assigned the default tablespace, and space for all objects created by non-system users comes from this tablespace.

EXAMPLE
- This tablespace contains the sample schemas that Oracle includes with the database. The sample schemas provide a common platform for examples. Oracle documentation and educational materials contain examples based on the sample schemas.

TRAINING (ORA-5) - Extent Management in Tablespaces


Extent Management in Tablespaces

1.) Locally Managed Tablespace:
- Free extents are managed in the tablespace.
- Bitmap is used to record free extents.
- Each bit corresponds to a block or group of blocks.
- Bit value indicates free or used.

2.) Dictionary Managed Tablespace:
- Free extents are managed by the data dictionary.
- Appropriate tables are updated when extents are allocated or deallocated.

Sunday, 24 July 2016

TRAINING (ORA-4) - Database Logical Architecture


Database Logical Architecture


Database objects such as table, index are stored as segments in tablespaces. Oracle uses the term “segment” to describe any structure that contains data. Typical segment is a table, containing rows of data, but there are more than a dozen possible segment types in an Oracle database. Of particular interest are table segments, index segments, and undo segments. Tables contain rows of information; that indexes are a mechanism for giving fast access to any particular row; and that undo segments are data structures used for storing information that might be needed to reverse, or roll back, any transactions that you do not wish to make permanent.

> System administrators see physical datafiles; programmers see logical segments. Oracle abstracts the logical storage from the physical storage by means of the tablespace.
> A tablespace is logically a collection of one or more segments, and physically a collection of one or more datafiles.
> One tablespace can belong to only one database at a time.
> One tablespace consist of one or more data files.
> Tablespaces are further divided into logical units of storage called Segments.
> Segments exist within a tablespace.
> Segments are made of a collection of extents.
> Extents are a collection of data blocks.
> Data blocks are mapped to OS blocks.

TRAINING (ORA-3) - Database Physical Architecture


Database Physical Architecture


Control Files

> The control file is small, but vital.
> Every database has minimum one control file.
> It contains pointers to the rest of the database: the locations of the online redo log files and of the data files.
> It also stores information required to maintain database integrity: various critical sequence numbers and time stamps.
> The control file will usually be no more than a few megabytes big, but you can’t survive without it.
> Control file maintenance is automatic; your only control is how many copies to have, and where to put them.
> Control file are multiplexed to protect against loss.


Redo Log Files

> Record changes to the database.
> Every database has at least two online redo log files.
> The online redo logs store a continuous chain in chronological order of every change applied to the database. This will be the bare minimum of information required to reconstruct, or redo, changes.
> The redo log consists of groups of redo log files, each file being known as a member.
> Oracle requires at least two groups of at least one member each to function.
> Redo Log files are multiplex to protect against loss.


Data Files
> Oracle stores data physically in data files and logically in tablespaces.
> Data files can belong to only one tablespace and one database.
> Data files are a repository for schema object data.
> Every Database must have two data files, to be created at database creation time.
> With previous releases of Oracle, you could create a database with only one datafile—10g requires two.
> One or more data files could create a single tablespace.

TRAINING (ORA-2) - Different Stages of Buffer in the Buffer Cache


Different Stages of Buffer in the Buffer Cache
Oracle uses least recently used algorithm to age out buffers that have not been accessed recently to make room to new blocks in database buffer cache. Buffer in the Buffer cache can be in any of the four stages:

Pinned: Multiple sessions are kept from writing to the same block at the same time. Other sessions wait to access the block.

Clean: Buffer is now unpinned and is a candidate for immediate aging out, if the current contents (data blocks) are not referenced again. Either the contents are in sync with the block stored on the disk or the buffer contains a consistent read (CR) snapshot of a block.

Free or Unused: The buffer is empty because the instance has just started. This state is very similar to clean state except that the buffer has not been used.

Dirty: Buffer is no longer pinned but the content (data blocks) have changed and must be flushed to the disk by DBWn before it can be aged out.

TRAINING (ORA-1) - Oracle Technical Architecture


Instance: Memory Structures and Background Processes


Memory Structures:

1.) Shared Pool Shared Pool is further subdivided into a number of other structures.

i.) The library Cache: 
The library cache is a memory area for storing recently executed code, in its parsed form. Parsing is the conversion of code written by programmers into something executable, and it is a slow process that Oracle does on demand. By caching parsed code in the shared pool so that it can be reused without reparsing, performance can be greatly improved.
ii.) Data Dictionary Cache
The data dictionary cache stores recently used object definitions: descriptions of tables, indexes, users, and other metadata definitions. Keeping such definitions in memory, rather than having to read them repeatedly from the data dictionary on disk, enhances performance.

2.) Database Buffer Cache
Database Buffer Cache is Oracle’s work area for executing SQL. Users don’t ever update data on disk. They copy data into the database buffer cache and update it there, in memory. Ideally, all the data that is frequently accessed will be in the database buffer cache, therefore minimizing the need for disk I/O.

3.) Log Buffer
Log Buffer is a very small memory structure used as a short-term staging area for all changes that are applied to data in the database buffer cache.

4.) Large Pool 
Large Pool is an optional area that, if created, will be used automatically by various processes that would otherwise take memory from the shared pool.

5.) Java Pool 
Java Pool is required only if your application is going to run Java stored procedures within the database: it is used for the heap space needed to instantiate the Java objects. However, a number of Oracle options are written in Java, so the Java pool is considered standard nowadays.
Streams Pool is used by Oracle streams, an advanced tool that is beyond the scope of this session.


Background Processes:

SMON
SMON’s major function is opening the database: enabling the connection between the instance and a database. During normal running, it carries out a number of monitoring and tidying-up operations.

PMON
PMON looks after user sessions, taking appropriate action if a session gets into trouble. For instance, if a user’s PC reboots while the user is logged on to the database, PMON will detect this and tidy up whatever work the user had in progress.

DBWn 
DBWn process or processes (by default, an instance will have one database writer per eight CPUs) is responsible for all writing to datafiles. Remember no sessions ever update data on disk; they update only data in the database buffer cache: all updates are then funneled through the DBWn to disk. In general, DBWn writes as little and as rarely as possible. The assumption is that disk I/O is bad for performance, so Oracle keeps it to a minimum.

LGWR 
LGWR propagates all changes applied to data in the database buffer cache to the online redo log files on disk. In contrast with DBWn, this disk write activity is done as near as possible in real time—and when you issue the COMMIT statement, it really is done in real time: it immediately flushes the changes from their small and temporary staging area, the log buffer in the SGA, to the online redo log files on disk. This is to ensure that all users’ work is saved so that, in the event of damage to the database’s datafiles, the changes can be applied to a restored backup. In this manner Oracle can guarantee that data will never be lost.

CKPT
CKPT process is responsible for ensuring that, from time to time, the instance is synchronized with the database. In principle, the database is always out of date: there will be changes that have been applied in memory that have not yet been written to the datafiles by DBWn (though the changes themselves will have been streamed out to the online redo log files by LGWR as they happen). There are occasions when it is necessary to force a write of all changed data from the database buffer cache to the datafiles, to bring the database right up-to-date. The CKPT process controls the frequency of this.

Saturday, 26 March 2016

TROUBLESHOOTING (OBIEE)- “TNS:could not resolve the connect identifier specified at OCI call OCIServerAttach”

ISSUE/ERROR:

While generating result for a simple analysis in OBIEE getting below error when clicked on result tab :
Odbc driver returned an error (SQLExecDirectW).
  Error Details
Error Codes: OPR4ONWY:U9IM8TAC:OI2DL65P
State: HY000. Code: 10058. [NQODBC] [SQL_STATE: HY000] [nQSError: 10058] A general error has occurred. [nQSError: 43113] Message returned from OBIS. [nQSError: 17001] Oracle Error code: 12154, message: ORA-12154: TNS:could not resolve the connect identifier specified at OCI call OCIServerAttach. [nQSError: 17014] Could not connect to Oracle database. (HY000)


SOLUTION:
This error indicate that when OBI reports/servers tries to connect to database something not working/appropraite at client(browser/BI server) and DB connectivity level. In OBIEE (an other apps too) it could primarily due to below reasons:

1.) At rpd level there is incorrect details of  Data Source Name (DSN) in your connection pool configuration. Make sure it matches to what you have in your tnsnames.ora file
2.) At rpd details of  Data Source Name (DSN) is correct but in tnsnames.ora file DSN details are not correct. Make sure it matches to what you have in your tnsnames.ora file
3.) Possibly you have multiple tnsnames.ora on the machine server names. (OBIEE usees tnsnames.ora file present at <FMW_HOME>\Oracle_BI1\network\admin for example C:\app\Manish\product\11.2.0\OBIEE11.1.1.6.0\Oracle_BI1\network\admin


In my case its was scenario-3 for the issue. Below are the steps I followed to resolve the issue.

1.) log in to the server
2.) go to the directory where the tnsnames.ora file is located
cd $FMW_HOME/Oracle_BI/network/admin

3.) create a copy of tnsnames.ora
cp tnsnames.ora tnsnames.ora[_orig_date]

4.) edit the tnsnames.ora file and add the entr for your DSN name. Save and Exit.

5.) Restart all the bI services to pick the latest tns/dsn entries.

Sunday, 20 March 2016

TROUBLESHOOTING (OBIEE/WEBLOGIC) - Windows registry related error while running startWebLogic.cmd

ISSUE:

While running startWebLogic.cmd below error is displayed:


<20 Mar, 2016 8:23:39 PM IST> <Error> <oracle.bi.management.localservices> <OBI-SYSMAN-1108> <Unexpected error configuring ODBC DSNs
oracle.bi.installhandler.util.ConfigurationException: Non-zero (1) return value Updating windows registry entry: Key: HKEY_LOCAL_MACHINE\SOFTWARE\ODBC\ODBC.INI\coreapplication_OH2030226780, Type: REG_SZ, Value: SecondaryCCS, Data: "", process stdout:

stderr:
ERROR: Access is denied.

Though the weblogic admin services gets started successfully and could login into weblogic console & EM but but notsure why error is appearing. Similar issue could also appear in starting the managed web servers as well.

SOLUTION:
The possible root cause seems related to the user id used to start the startWebLogic.cmd as windows 7, 8 & 10 have added constraints on access & permissions.

When startWebLogic.cmd is started as an administrator user i.e. "Run as Administrator", error does not appear.

Sunday, 10 January 2016

TRAINING (OBI-7) - OBIEE ADMIN TOOL - Part5 (Validating Repository)

OBIEE Admin Tool - Consistency Check
OBI Admin tools came bundled with an inbuilt feature of checking the consistency and validity of the rpd. These validation checks certain requirements before confirming the rpd as a valid rpd.

How to perform Consistency Checks in OBI Admin tools:
Consistency checks for entire repository or for individual objects could be performed by
1.) File > Check Global Consistency
2.) Tools > Show Consistency Checker
3.) Right Click the object > Check Consistency
4.) Save the repository

Consistency Checks performed by OBI Admin tool:
Some of these checks are listed below:

  • All logical columns are mapped directly or indirectly yo one or more physical columns.
  • All logical dimension tables have a logical key.
  • All logical tables have a logical join relationship to another logical table.
  • There are atleast two logical tables in the business model:
    • A logical fact table
    • A logical dimension table
  • Both can map to same physical table.
  • There are no circular join relationship.
  • A subject area exists for the business model.

Consistency Checks Output:
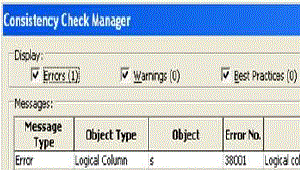
Consistency Checks output can be categorized in below three categories-


  1. Errors: Should be fixed to make repository valid and consistent.
  2. Warnings: Conditions that may or may not be an error but ideally must not be there.
  3. Best Practices: Good to follow the advise, but does not indicate any error or inconsistency.
Consistency check will check the logical checks but does not perform physical (va checks. For example in a join you could compare a date with number and consistency check will not error.  

Saturday, 9 January 2016

TRAINING (OBI-6) - OBIEE ADMIN TOOL - Part4 (Building Presentation Layer)

PRESENTATION LAYER
  • Presentation layer is the only layer visible to end users (Report Developer or clients).
  • Presentation layer is the second layer in the repository development.
  • Exposes only the data meaningful to the end users.

Presentation Layer Mappings
Presentation Layer objects map to objects in the BMM layer.
  • Subject Area map to Business Model.
  • Presentation table map to Logical Tables.
  • Presentation columns map to Logical Columns.

Presentation Layer Objects:


1. Subject Area (Called as presentation catalog in 10g)


  • One single Subject Area must be populated with content from a single business model and not from multiple business models.
  • Multiple Subject Area can reference same/common business model.
  • Different Subject Areas can be created to serve different set of user communities.

2. Presentation Table


  • Organizes presentation columns into categories that end users understand.
  • May contain columns from one or more logical tables.
  • Can be modified independently of logical tables.
  • Can be created:
    • Automatically by dragging logical tables from BMM layer.
    • Manually in the presentation layer.
2.1 Nested Presentation Tables


  • Give  the appearance of nested folders in Oracle BI application browser interface.
  • Prefix the name of the presentation folder to be nested with a hyphen and a space (- )..
  • Prefix the name of the presentation folder to be nested with a hyphen and a greater then symbol (->). space.
  • Place it after the folder (Presentation Table) in which it nests.
    • To create Nested Tables
      • Double click the the subject area.
      • Click on Add (+) button in Presentation Table tab
      • Mention the name of the nested table (Sub folder). Make sure to specify either -> or - in the description.
      • Click OK and then OK again.
      • Drag and drop all the presentation column/measure from presentation table to nested table.
      • Move nested table (Sub folder) below the parent presentation table (Parent folder).

3. Presentation Column


  • Define the columns used to build queries in the Oracle BI user interface.
  • Map to logical columns in the BMM layer.
  • Can be created: 
    • Automatically by dragging logical tables oor columns from BMM layer.
    • Manually in the presentation layer
3.1 Aliases


  • Keep track of any changes to Present layer objects.
  • Applicable for both presentation table & presentation columns.
  • As you can see in above screenshot SAL Column renamed to Salary has been tracked by Alias.

4. Hierarchy object (Newly introduced in 11g)

  • Used for Drill down Drill up analysis in business.

How to Build Presentation Layer:
To build the Presentation layer of a repository, you need to perform following steps:

1.) Create a new Subject Area.
Refer above notes.

2.) Create and map Presentation Tables
Refer above notes.

3.) Create and map Presentation Columns
Refer above notes.

4.) Create Presentation Hierarchy
Will discuss later.

5.) Save & Validate the rpd
Will cover in next session.

6.) Deploying the rpd on BI servers and test the user interface in the Presentation Layer
Presentation layer objects define the interface that users see to query the data from the data sources. Below screenshot displays look & feel of presentation layer in BI application browser window after we deploy the rpd on BI servers.


Presentation Columns are automatically renamed when the corresponding logical object is renamed. If you want to disable this property double click on the presentation column and uncheck the "Use Logical Column name" checkbox and click OK.


Presentation tables cannot have the same name as the Subject Area.
Presentation objects can be modified or deleted without affecting corresponding logical objects.


Key points to remember while designing the presentation layer:

  • Names cannot contain single quotation mark. The BI tool prevents it.
  • Use of double quote mark is permitted but should be avoided.
  • Keep presentation object names unique:
    • Naming presentation columns the same as presentation tables can lead to inaccurate results.
    • Uniqueness allows SQL statements to be shorter because qualifiers are unnecessary.
  • Eliminate unnecessary objectc to reduce confusion.
  • Keep names short to save space on reports.

Saturday, 2 January 2016

TRAINING (OBI-5) - OBIEE ADMIN TOOL - Part3 (Building Business Model and Mapping Layer)

BUSINESS MODEL & MAPPING LAYER
  • BMM Layer is also called as logical or business layer.
  • BMM layer is the second layer in the repository development.
  • BMM layer contains ‘n’ number of business models also known as subject area or data mart
  • BMM layer objects map to source data objects in the physical layer.
  • In BMM layer physical schema and objects are simplified to represent the user's view of the data i.e. technical terminology converted into business terminology. Eg: a column name EXPND going to be converted into Expenditure.
  • Maximum effort in rpd development is spend in this layer (approx 80% of overall rpd development)

Business Model Mappings
BMM & Physical layer objects mappings are typically not one-to-one:
  • One Business Model may map to multiple/different data sources.
  • One Logical Tables may map to multiple/different physical tables.
  • One Logical Columns may map to multiple/different physical columns.
  • One Logical Table Source may map to many physical sources

Business Model and Mapping (BMM) Layer Objects
BMM layer contains business model objects.


1.) Business Model

 
  • Highest level object in the BMM layer.
  • Contain the business model definitions and the mappings from logical to physical tables.
  • Simplifies the physical schema.
  • Object names are more business specific rather then technical.

2.) Logical Display Folder


3.) Dimension Hierarchies


4.) Logical Tables
  • Can be created:
    • Automatically by dragging tables from Physical layers
    • Manually by right clicking business model and selecting New Object > Logical Tables
  • Can be modified without affecting physical layer objects.
  • Can be of two categories.
    • Logical Dimension TableRepresent Dimension data
          
    • Logical Fact Table
      Represent Fact data
              

5.) Logical Table Sources


  • Defines the mapping from a Logical Table to a Physical Table
    • Logical tables may have multiple logical table sources
    • One Logical Table Source may map to many physical sources
  • Logical Table Source: Column Mappings
    Double click the Logical table Source > Click the Column Mapping tab to build, view or modify logical to physical column mappings.


6.) Logical Columns


  • Represent the business view of the data
  • May map to many column in the Physical layer
  • May be defined by other logical columns
  • Can be created:
    • Automatically by dragging tables or columns from the physical layer
    • Manually by right clicking a logical table and selecting New Object > Logical Column

7.) Logical Primary Keys


  • Define unique identifiers for logical tables.
  • Are required for each logical dimension table for a valid repository.

8.) Measures (columns with a scale icon)


  • Are the facts a business uses to evaluate its performance
  • Are calculations that define measurable quantities
  • Are created on logical columns in the fact table
  • Have a defined aggregation rule

9.) Logical Joins

  • Express the cardinality relationship between logical tables and are required for a valid business model.
  • Logical Join forms the foundation for BI server to understand the relationship between various objects of Business Model and how to construct the physical queries at run time.
  • Logical SQL won't generate with
  • Arrow mark at Dimension table end or at one's end (in one to many relationship). 
  • Logical join has no key relationship or expression defined as compared to physical join.
Why are joins defined again in Logical layer, when the joins are already defined at physical layer?
Since in Physical layer we can't define
1.) Driving Table (Which table will drive the query execution)
3.) Type of join (Inner, Left Outer, Right Outer, Full Outer Join)
2.) Cardinality (Relationship between tables 1-1, 1-M etc)
Also
4.) In BMM layer BI Admin tool can't understand if the table is dimension or fact table without join and assign dimension icon to all the tables until join is not defined. Once join is defined Logical fact tables icon is with # symbol and Logical dimension table without # symbol.
5.) Logical SQL is created on the basis of BMM Joins used for optimizing query which is used by BI sever.

Driving Table - Always select driving table which have less number of rowsas it helps in performance of SQL execution. Generally dimension tables contains less number of records, and is selected in Logical join as Driving table.

How to build Logical Layer:

1. Create the logical business model
Refer above notes.

2. Create the logical tables and columns
Refer above notes.

3. Define the logical joins

How to view existing Logical Joins in Logical layer:

Select the Business Model in BMM Layer > Right Click and go to Business Model Diagram > Whole Diagram > You should now be able to see the logical joins already created


Double click the arrow should open the Logical join properties.

How to create Logical joins in Logical Layer
> Select the Business Model in BMM Layer
> Right Click and go to Business Model Diagram
> Whole Diagram
> Click on new join icon  on toolbar
> Drag the Join Tool from D1 Manish First Logical table EMP to D1 Manish Second Logical table DEPT table ( Arrow mark at Dimension table end or at one's end (in one to many relationship))
> Click OK


Note that Logical join has no key relationship or expression defined as compared to physical join.

4. Modify the logical tables and columns
Rename, Reorder, Add, Delete logical tables, columns, sources.

5. Define the measures
Right Click the Logical Column and select Properties > Aggregation > Selection one of the Default Aggregation Rule from drop down > Click on OK > Logical Column icon changes to Scale representing a Measure.